The rustic charm and character of reclaimed barn wood have made it increasingly popular among woodworkers, DIY enthusiasts, and interior designers alike. Beyond its aesthetic appeal, using old barn lumber represents a sustainable choice that gives new life to materials with decades or even centuries of history. However, transforming weathered, rough-sawn boards into usable material requires careful preparation. Proper preparation isn’t just about aesthetics—it’s essential for ensuring your finished project is safe, durable, and showcases the unique character that makes reclaimed wood so desirable.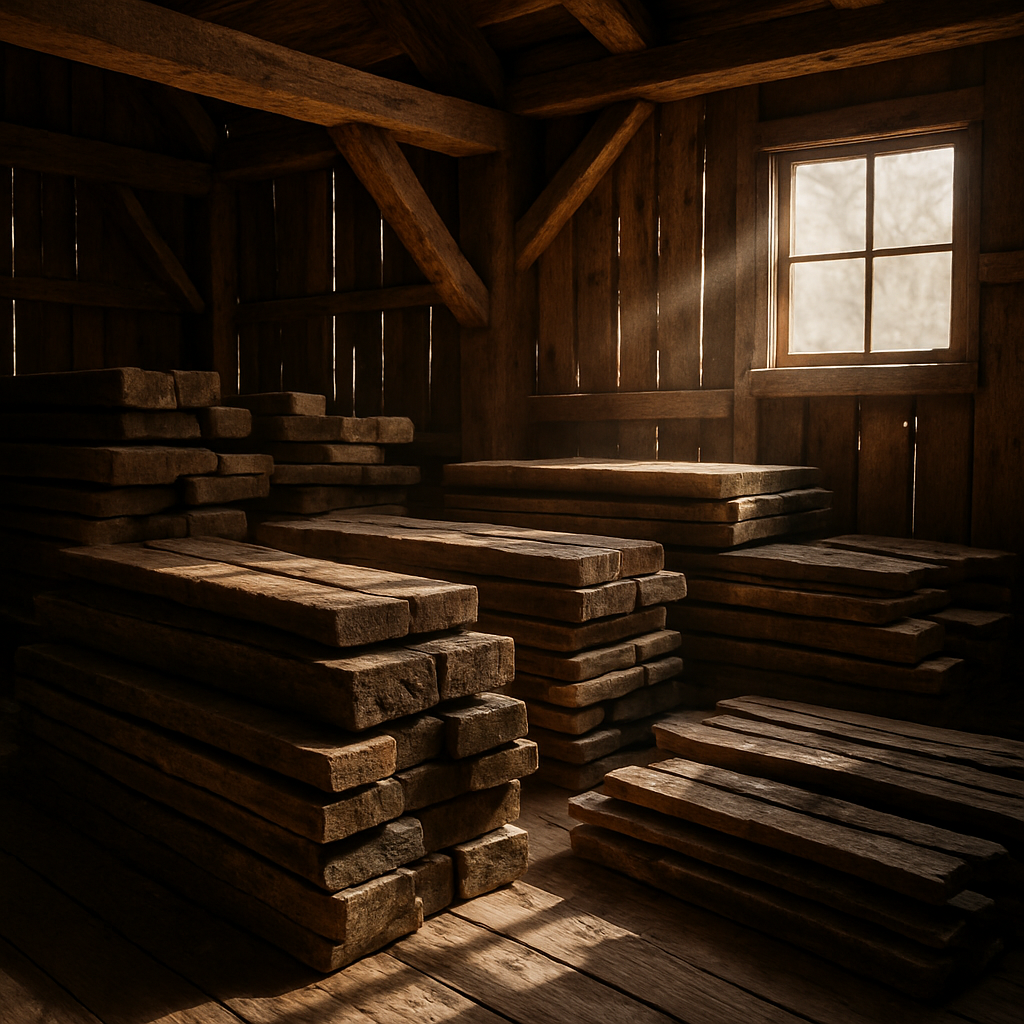
In this comprehensive guide, you’ll discover the five essential best practices for preparing old barn lumber, from initial inspection to final finishing touches. Whether you’re creating furniture, accent walls, or decorative pieces, these steps will help you transform rough reclaimed wood into project-ready material while preserving its distinctive character and ensuring lasting results.
Inspecting and selecting the right barn lumber
Before investing time and effort into preparation work, carefully examining potential barn wood pieces ensures you’re starting with suitable material. The condition, wood species, and overall quality of your reclaimed lumber significantly impact your project’s success and longevity.
Begin by examining each piece in good lighting, preferably natural daylight.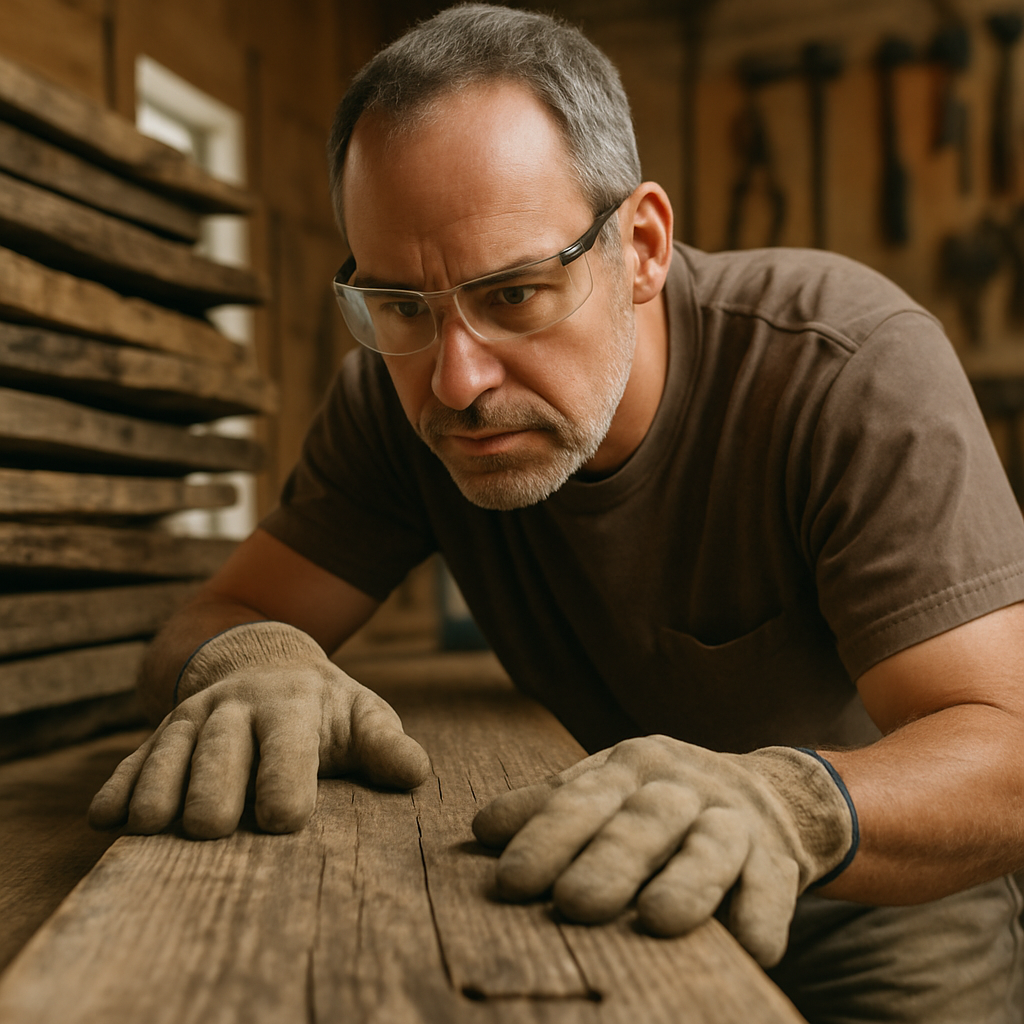
Look for signs of excessive rot, particularly at the ends of boards or around former attachment points. Some surface weathering adds character, but deep rot compromises structural integrity. Gently probe suspicious areas with a screwdriver—if it easily penetrates more than ¼ inch, the wood may be too degraded for most applications.
Check for insect damage by looking for small holes, tunneling patterns, or powdery residue. While minor insect damage might be acceptable for decorative projects, extensive infestation could indicate structural weakness. Next, assess each board for warping, twisting, and splitting. Lay the board on a flat surface to check for significant bowing or cupping that might make it difficult to work with.
Run your hands along the surfaces to feel for hidden metal. Old barn wood often contains numerous fasteners, some visible and others buried within the wood. Using a metal detector specifically designed for woodworking can help identify embedded nails, screws, or other hardware that might damage tools during processing.
- examine both faces and edges for usable surfaces
- consider wood species and its suitability for your project
- look for unique character marks like saw marks, patina, or nail holes
- check moisture content using a moisture meter
- select boards with similar coloration if uniformity matters
When selecting wood, consider its intended use. For structural applications like furniture or shelving, choose the sturdiest pieces with minimal defects. For purely decorative projects, boards with more character—including knots, checks, and color variations—often create more visual interest. Remember that reclaimed wood often comes from old-growth forests with tight grain patterns and superior density compared to new lumber, making even imperfect pieces valuable for the right applications.
Cleaning and sanitising old barn wood
Once you’ve selected suitable lumber, thorough cleaning removes accumulated dirt, debris, and potential contaminants. This step not only improves appearance but addresses health concerns by eliminating mold, mildew, and animal waste that may have accumulated during decades of agricultural use.
Start with dry cleaning methods to remove loose debris.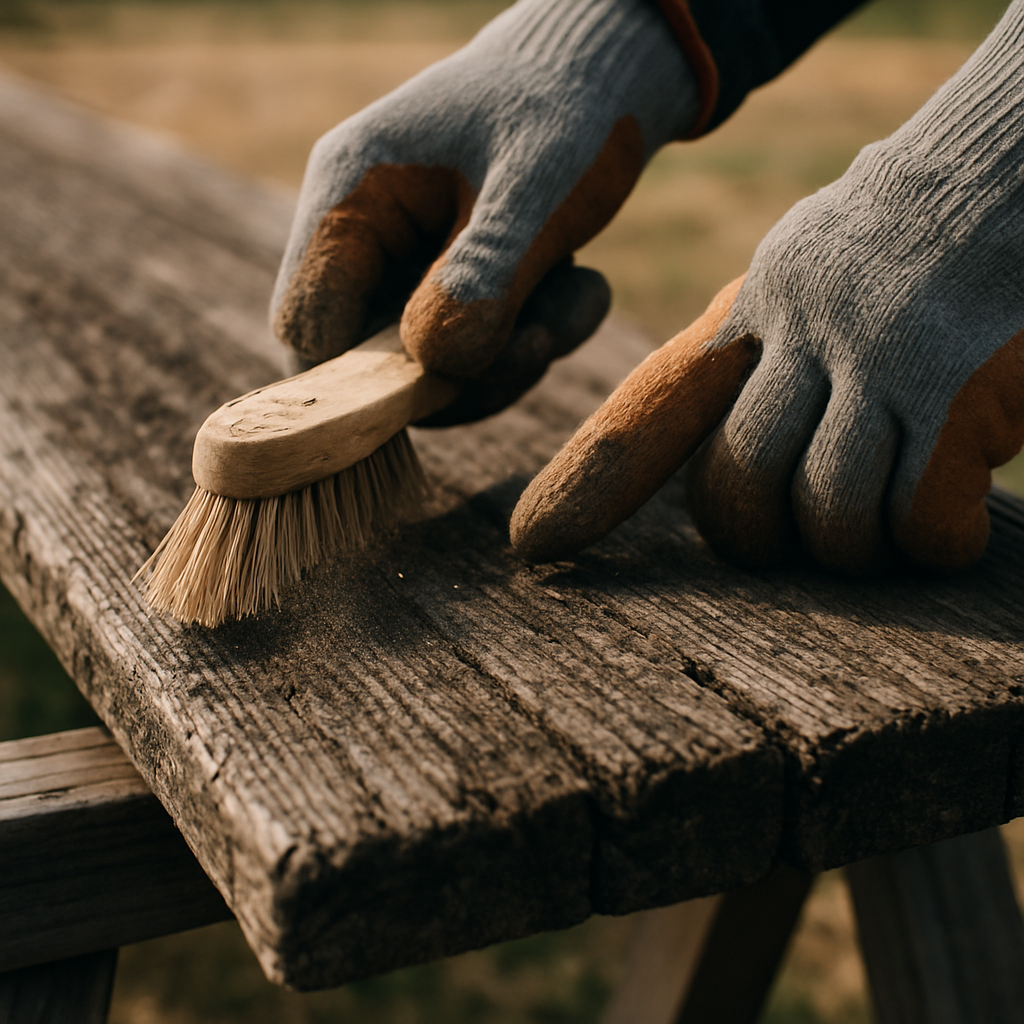
A stiff-bristled brush (not wire, which can damage the wood surface) works well for dislodging dirt from crevices and between fibers. For stubborn areas, compressed air can blast away debris without adding moisture. After dry cleaning, vacuum the wood to remove loosened particles.
For deeper cleaning, prepare a solution of mild soap and warm water. Avoid harsh chemicals that might damage the wood’s patina or react with any residual farm chemicals. Apply the solution with a soft brush, working with the grain rather than against it. For stubborn stains or mold, a mixture of one part white vinegar to four parts water can be effective. Always test cleaning solutions on an inconspicuous area first.
After wet cleaning, thoroughly rinse with clean water to remove soap residue. Immediately towel-dry surfaces to prevent excessive moisture absorption. Some woodworkers use a diluted bleach solution (1 part bleach to 10 parts water) for sanitising, particularly if there’s evidence of mold or mildew growth. If you choose this route, ensure proper ventilation and protective gear, rinse thoroughly afterward, and neutralise with white vinegar to prevent ongoing bleach action that could weaken the wood.
Safe handling and proper drying
After cleaning, proper drying prevents warping, cracking, and mold regrowth. Stand boards on edge with spacers between them to allow air circulation on all sides. Place them in a well-ventilated area away from direct sunlight, which can cause uneven drying and additional checking (cracking).
Depending on how thoroughly the wood was wetted during cleaning and its starting moisture content, drying may take several days to weeks. Using a moisture meter, aim for a moisture content of 6-8% for indoor projects or 12-15% for outdoor applications. Monitor the wood during drying and adjust board positions if you notice any developing warps or twists.
While handling reclaimed wood, always wear gloves to protect against splinters and potential chemical residues. Long sleeves, eye protection, and a dust mask are also advisable, especially when working with particularly dirty or dusty pieces. Some woodworkers prefer to sanitise their reclaimed lumber outdoors to minimise exposure to airborne particles and mold spores.
De-nailing and preparing the surface
Removing metal hardware is perhaps the most tedious yet critical step in preparing reclaimed barn lumber. Overlooked nails, staples, or screws can damage expensive saw blades and planer knives—or worse, cause dangerous kickback during cutting operations.
Begin by identifying all visible fasteners. Mark each one with chalk or a grease pencil to ensure none are missed. For protruding nails or screws, use end-cutting pliers or a cat’s paw nail puller. Place a block of wood under the tool’s head to protect the wood surface while extracting fasteners. For flush or countersunk nails, a nail set can drive them through the opposite face if removing them might damage the wood.
After removing visible hardware, scan each board thoroughly with a metal detector designed for woodworking. These specialised detectors can locate buried fasteners that might otherwise remain hidden. Mark any detected metal for removal. Some deeply embedded metal fragments may need to be drilled out or worked around if removal would compromise the board’s integrity.
Once de-nailed, examine each board for loose splinters or unstable areas. Use a cabinet scraper or chisel to carefully remove these hazards without eliminating the character-adding patina. Pay special attention to the ends of boards, which often harbor loose fibers and splits that should be trimmed before final processing.
At this stage, decide whether to preserve the wood’s rustic appearance or prepare it for a smoother finish. For the rustic look, minimal surface preparation may be needed—perhaps just a light sanding to remove dangerous splinters. For furniture or finished projects requiring smoother surfaces, more extensive preparation will be necessary during the milling and finishing stages.
Document any interesting features like mortise pockets, original saw marks, or hand-hewn surfaces you want to preserve. These character elements make reclaimed wood special and often become focal points in finished pieces. Planning your cuts and joinery to showcase these features rather than eliminate them can significantly enhance your project’s appeal.
Treating for pests and stabilising the wood
Barn lumber often harbors insects, eggs, or larvae that could damage your project or spread to other wood in your home. Proper treatment eliminates these pests while stabilising the wood for long-term use.
Visual inspection reveals active infestations. Look for fresh sawdust piles (frass), which indicate boring insects actively tunneling through the wood. Small holes with clean, sharp edges suggest recent insect activity, while weathered holes typically indicate old, inactive damage. Listen carefully—active infestations sometimes produce audible clicking or crunching sounds as larvae feed inside the wood.
Several treatment options exist for addressing potential infestations. Heating the wood to a core temperature of 130°F (54°C) for at least 30 minutes kills most wood-boring insects and their eggs. This can be achieved in a solar kiln, conventional kiln, or for smaller pieces, a household oven with careful temperature monitoring. Alternatively, freezing lumber at 0°F (-18°C) for at least 72 hours can eliminate many pests.
For chemical treatment, borate solutions penetrate wood fibers to kill existing insects and prevent future infestations. These treatments are relatively safe when dry and particularly effective against termites, powderpost beetles, and other common wood-boring insects. Apply the solution by spraying, brushing, or dipping, following manufacturer guidelines for dilution and application.
Beyond pest control, stabilising the wood addresses structural issues like checks, splits, and loose knots. For minor cracks, consider filling with epoxy mixed with sawdust from the same wood for colour matching. Larger voids may become decorative features filled with tinted epoxy or left as-is for character. Loose knots can be stabilised with thin cyanoacrylate glue (super glue) applied from the back side, allowing the knot to remain visible while preventing it from falling out.
Sealing and protecting your lumber
After treatment, applying a sealer helps stabilise moisture content and prevents new infestations. For rustic projects where the natural patina is important, choose penetrating sealers that protect without changing appearance. Options include boiled linseed oil, tung oil, or specialised reclaimed wood sealers that preserve the aged look while adding protection.
For structural stability in pieces with significant checking or splitting, consider applying wood hardener to deteriorated areas. These products penetrate soft or damaged wood, drying to form a solid base for further finishing. Apply to affected areas following manufacturer directions, typically allowing 24 hours for curing before proceeding with additional preparation steps.
Milling, sanding, and finishing to suit your project
The final preparation phase transforms your cleaned, de-nailed, and treated lumber into project-ready material. Your approach depends on whether you’re preserving rustic character or creating refined surfaces for furniture or cabinetry.
For rustic projects, minimal milling preserves character. Consider skip-planing, which lightly skims the surface without removing all marks and patina. This creates a more consistent thickness while maintaining the weathered appearance. Hand scraping selectively smooths rough spots while preserving the wood’s age marks. Wire brushing softens sharp edges and removes loose fibers while enhancing grain patterns, especially effective on softwoods like pine and fir.
For furniture-grade preparation, more comprehensive milling creates precisely dimensioned lumber. Begin by crosscutting boards to remove severely damaged sections and establish straight ends. Joint one face and one edge to create reference surfaces, then plane to consistent thickness. Rip boards to final width using the jointed edge as a reference. This traditional dimensioning sequence yields straight, square lumber suitable for fine woodworking.
Sanding requirements vary by project.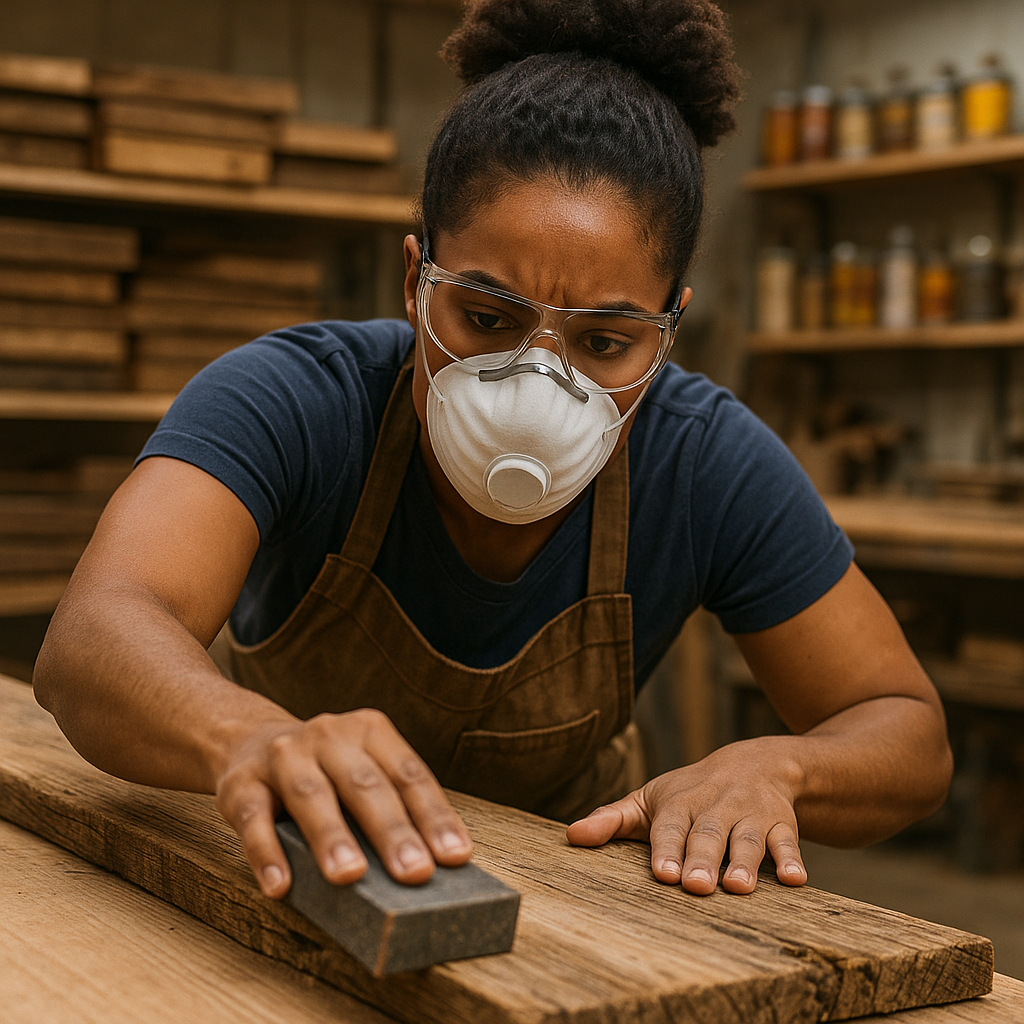
For rustic pieces, hand sanding with 80-120 grit paper removes dangerous splinters while maintaining character. For furniture, progressive sanding through multiple grits (typically 80-120-150-180 for most projects) creates smooth surfaces ready for finishing. Always sand with the grain to avoid cross-grain scratches that become visible under finish.
When finishing reclaimed wood, consider products that enhance rather than conceal its character. Penetrating oils like tung oil, danish oil, or hardwax oils highlight grain patterns while providing moderate protection. For more durable protection, shellac provides a traditional look compatible with the age of reclaimed materials. Water-based polyurethanes offer excellent durability with minimal color change, while oil-based versions impart amber tones that complement aged wood.
Test finishes on scrap pieces cut from your reclaimed stock to ensure compatibility with any existing residues or treatments. Some old woods react unexpectedly with modern finishes due to chemicals they absorbed during their previous life or treatments applied for preservation.
Throughout the milling and finishing process, maintain awareness of the unique characteristics that make each piece special. The nail holes, saw marks, weathered surfaces, and color variations that might be considered defects in new lumber become prised features in reclaimed material. Your preparation should preserve these elements while making the wood suitable for its new purpose.
Conclusion
Preparing old barn lumber transforms rough, weathered boards into treasure-filled material ready for your creative vision. The process requires patience and attention to detail, but the results—unique projects with history, character, and sustainability built in—make the effort worthwhile. By following these five best practices—careful inspection and selection, thorough cleaning and sanitising, meticulous de-nailing, effective pest treatment and stabilisation, and appropriate milling and finishing—you’ll maximise both safety and quality in your reclaimed wood projects.
Remember that each piece of reclaimed wood tells a story through its grain pattern, color variations, and marks of its previous use. Your preparation process should honor that history while ensuring the wood performs well in its new application. Whether you’re creating rustic accent pieces that showcase weathered patina or refined furniture with the distinctive tight grain patterns of old-growth timber, properly prepared barn lumber offers both aesthetic and environmental benefits unmatched by new materials.
With your reclaimed lumber now properly prepared, you’re ready to begin the rewarding process of creating something new from something old—continuing the story of this remarkable material for generations to come.
Frequently asked questions
What is the best way to clean old barn wood before using it?
Use a stiff brush and mild soap to scrub the surface, rinse with water, and allow the wood to dry thoroughly before further processing.
How do I remove old nails and metal from barn lumber safely?
Use tools like pliers and a cat’s paw; scan with a metal detector to ensure all metal is removed to prevent damage to woodworking tools and injury.
Do I need to treat reclaimed barn wood for pests?
Yes, especially if you notice holes or powdery residue. Use borate solutions or consult a professional for severe infestations.
Can you use barn wood without sanding or finishing it?
You may retain a rustic look, but for safety and easier maintenance, light sanding and sealing are recommended.
Is old barn lumber safe for indoor furniture projects?
If properly cleaned, de-nailed, treated for pests, and finished, barn lumber can be safely used for indoor furniture and decor.